1: Composite floor is most suitable for paste construction process
Sticking construction refers to leveling with 15 mm thick 1:3 cement mortar on the concrete structure layer, or sticking the wooden floor directly to the ground with no polymer binder. This method is simpler than other construction methods. . Generally suitable for composite wood floors.
Step1: Primary Processing
Adhesive wood floor tiles to ensure that the cement mortar floor does not play sand, no cracks, the base must be cleaned. The unevenness of the grass-roots level applies cement mortar leveling and then paving the wood floor. The base layer moisture content is not more than 15%. When glueing wooden floor glue, it should be thin and even.
Grass-roots clean-up → brushing primer → elastic wire, leveling → drilling, installing embedded parts → installing wool floor, leveling, planing → nailing floor, leveling, planing → nailing baseboard → planing, sanding → paint → on wax.
Step2: Floor treatment
When glueing wooden floor glue, it should be thin and even. And preferred glue with better environmental protection, reduce the degree of future chemical emissions.
Step3: nail floor
Multi-layer solid wood flooring without nails, directly on the keel on it. The main purpose of nailing is to stabilize the floor and prevent it from deforming. The structure of the multi-layer solid wood floor, you can see that the cross-section is staggered, the stability is very good, normal pavement does not need to fight nails, people will not move to the floor on the top, and from the edge There are generally no problems with the locks, and if that one is broken, it is easy to change. However, there are more homes and homes, and it is best to use nails to make insurance more effective.
Step4: leveling, polishing
Waxing the floor is not a simple task and everyone can do it well. The wax must not be "flowered." The so-called "flowers" are called waxes, waxes, and the like. At this time, only a professional cleaning company can use special waxing water to lift the wax first, and then re-wax it after electrostatic treatment.
Waxing is generally divided into two types: one is liquid wax; the other is solid wax, and liquid wax is commonly used in people's lives, and it is both practical and practical for consumers. Hand waxing works best. Wax can be quickly and fully absorbed by the floor under manual force to achieve the best results. Wood floor waxing effect is more obvious, bright and realistic.

2: Suspension Laying Process Intensified Floor Crafting
Each suspension floor has 676 supporting points, the floor plane is 1.3cm high from the ground, and the bearing capacity per square meter is 10-15 tons. Compared with the general sports floor, the compression performance is good, and it can be moved without water accumulation. Will be cracked, basically do not need post-maintenance, is the most advanced sports floor in the world.
Step1: Grassroots Cleanup
The base level requires a smooth, dry, clean surface. If the floor of the building or bungalow is laid, waterproof treatment is required. The floor must be cleaned before paving the floor.
Step2: laying plastic film mats
Cushion paving materials can be used with foam pads with plastic film thickness of 3mm or bedding pads with thickness of 10-12mm, butt-laying, plastic interface connection; high-quality multilayer plywood with thickness of 9-18mm can also be used. Each piece of multilayer glue should be divided into small pieces, the area should be less than 0.7 square meters, preferably with paint anti-corrosion, fixed on the ground, must be firmly fixed around the board, between the board and the board to leave 3-6mm gap, sealed with tape.
Step3: Flooring
The direction of the paving floor is usually the same as the walking direction of the room. From the left to the right or from the right to the left, the grooves are laid one by one to the wall, and a wooden wedge is placed between the floor and the wall to leave expansion joints. First take a piece of floor, maintain an angle of 30~45 degrees with the ground, and place the tongue close to the groove on the last floor; gently lay down the floor after it is tight; use the claw hammer and small wooden block to beat along the floor edge to make the floor stitching Tight; If the floor is still tilted after tapping, hit the floor surface near the edges.
Note that in dry areas, the floor is wet and the expansion joints should be small; expansion joints in wet areas should be large enough. The last row of floors is to be cut, assembled, and tightened with a hook or spiral top by measuring its width. Take over the bridge installation: In the room, hall, hall interface between the interface, the floor must be done to deal with isolation, leave enough stretch joints, with the closing strip, metal bridge convergence.
Step4: Install skirting board
Skirting board installation, optional skirting board thickness should be greater than 1.2cm. When installing the floor expansion joint gap within 5-12mm, use polystyrene board or elastomer filling, to prevent the floor from loosening. Install the skirting board and be sure to cover the extension seam.

3: Real shop paving process to see solid wood floor construction
Truss-based wooden floor base adopts a trapezoidal cross-section wood joists. The distance between the wood joists is generally 400 mm, and some light materials can be filled in the middle to reduce the empty drum sound when walking and improve the heat insulation effect. In order to enhance the integrity, the wooden joists are laid on the nail floor and finally on the wool floor, they can be connected or bonded to the wooden floor. In addition, at the junction of a wooden floor and a wall, the skirting board will be used to cover the lid. To distribute moisture, ventilate holes in the skirting board.
Step1: Primary Processing
The unevenness of the grass-roots level applies cement mortar leveling and then paving the wood floor. The grass-roots level should be able to reach the surface without sand, no skin, no ash, no hollowing, no oil stains, and no rough feeling by hand. If it does not meet the requirements, it should first deal with the ground. General rough room floor only need to use a broom to clean the floor dust debris.
Step2: Install wooden keel
Embeddings should be made on the ground to fix the wooden keel. The embedded parts are bolts and lead wire. The distance between the embedded parts is 800 mm and they are drilled from the ground.
Step3: cushion insulation
The distance between the wooden joists is generally 400 mm, and the middle insulation layer reduces the empty drum sound when people walk and improves the heat insulation effect. The base layer and the back of the insulation layer are glued at the same time, and the plastic surface can be paved when it is not sticky.
Step4: level the floor after loading
The first is the lining board, on the already adjusted wood keel, the floor nailed full nail backing wood flooring nails for the liner thickness of 2.5 times more, leaving the gap between the liner 2mm. Then, the one against the wall should leave the 10mm gap in the wall, and then block it one by one. Use the floor nail to nail it diagonally from the concave corner of the floor. The nail cap must be flattened and the tongue plate must be nailed, tightly fastened, and wooden floorboards. The back should be brushed with high quality wood glue.
Step5: Install the baseboard
The baseboard is clamped into the reserved seam. The tools needed to fix the baseboard are floor nails and hammers. Keep the baseboard well, then nail the floor nails into the baseboard so that the skirting board is fixedly connected to the wall.
Flooring Flooring Flooring Cement Room Paint Home Cleaning Company
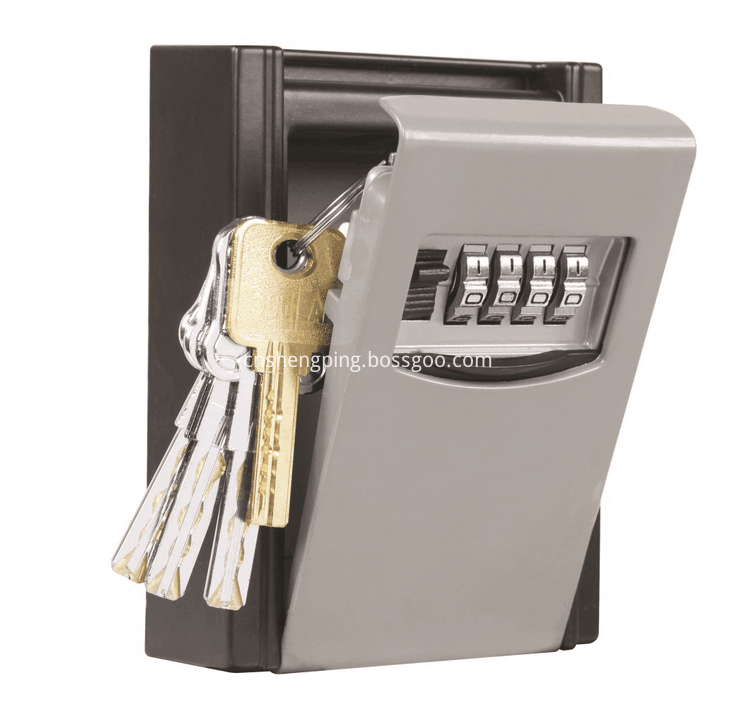
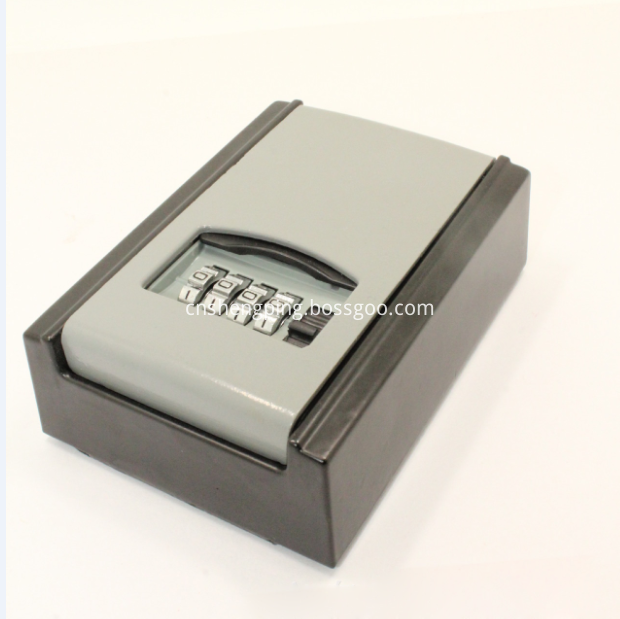
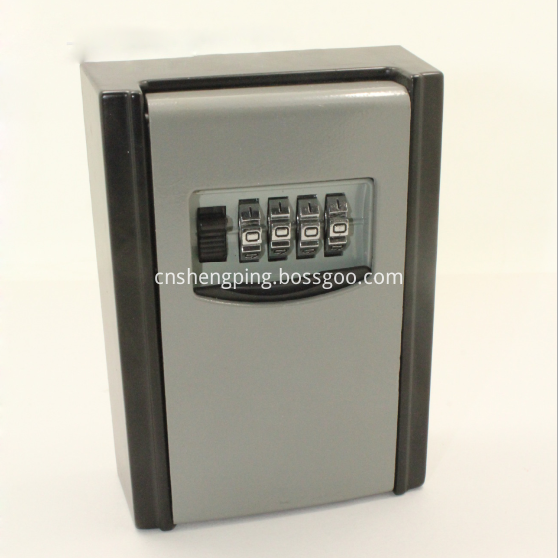
Feature Hanging key storage box with combination access to keys.
Large key storage compartment holds for house,car,or padlock .
Hangs from doorknob,fence,or just about anywhere
Personalized,adjustable combination lock with 4 dials offers up to 10,00 combination possibilties for optimal security.
USE
- Put it in a car or mount on wall
- Storage keys, door cards, and credit cards
- While moving out, door key can be put in the key box for the next user
- With shackle advantages: conveniently hangs on door knob, railing or fence


Shengping Safety Protection Locks Manufactur, create to set up in 1989, is an enterprise specialized in the manufacture of different kinds of locks. We have obtained quality system authentications as ISO9001-2000 International Quality Control System Attestation,and we have obtained self-operation export and import right etc. According to many years of producing and R&D experience, we produce locks more than 100 kinds of specification with different kinds of raw materials & styles. Moreover, we can do customized work as per clients`designs.
Bearing the sense of [quality gets victory", our products are popular in domestic market; and with the fame of our product`s [good quality and best prices", we have increased our export all over the world. Now our product lines are mainly for export.
We tightly hold the quality control system, follow the contract, and keep faith and valued mutual benefit. We sincerely welcome customers home and abroad and our craft brothers to develop and flourish the locks market.
Key Storage Lock Box Storage Key Box
Key Storage Lock Box,Metal Key Storage Box,Digital Key Storage Lock Box,Portable Key Storage Lock Box
Shengping Safety Protection Locks Manufacturer , https://www.chinajiuzhou.com